Avalara Shopware 5 Plugin
User Manual EN - landed cost
Shopware versions: From 5.2.x – 5.6.x CE
and separately 5.7.x CE
Module Language : english
PHP version : 5.4 or greater
More information for Avalara: http://www.avalara.com/
If you are interested in our newest Avalara Shopware 6 Plugin, please refer to this page.
This manual shows you step by step how to install the plugin to your online shop. Please test the installation and the configuration of the plugin on a test system before installing it on your live shop.
- Inhaltsverzeichnis
- Avalara Shopware 5 Plugin
- User Manual EN - landed cost
The Plugin
The Avalara Shopware Plugin enables an easy handling of exporting products to countries like Canada and the USA. The USA is known for an unclear tax system.So Avalara is taking over the accounting of taxes. The Plugin connects your Shopware Shop with Avalara. For each transaction to selected countries, the customers of your shop will get a runtime tax-result for their current order. After an Ordering the data and the tax-result will be transmitted to Avalara and Avalara will report the taxes to the corresponding government.
The module offers a multitude of settings to adapt your products to each tax-system.
Below you can find the list of supported features provided by the latest plugin version:
- Avalara tax calculation on checkout page for US and Canada addresses
- Net/gross prices tax calculation configurable, including shipping costs
- Avalara address validation, preventing your clients to use incorrect or wrong addresses
- Manual committing/refunding/cancellation option for Avalara transactions
- Cronjob available for automatic commitment of orders with shipping status "delivered"
- AvaTax tax codes for products, categories, shipping methods and vouchers can be configured in shop directly
- Discounted article tax calculation for all kind of shopware vouchers
- Customer exemption configurable in the shop
Plugin installation
Before you begin with the installation process, backup your database and your online shop. If you have concerns about installing the Plugin, let this job be done by a professional, or feel free to contact us for help. Please, follow this instruction carefully for an undisturbed use.
Install and activate via Shopware Plugin Manager
- Log in to your shop backend.
- Go to: Configuration > Plugin Manager > Installed.
- Click the button Upload plugin.
- Choose a zip-archive with the Plugin and upload it.
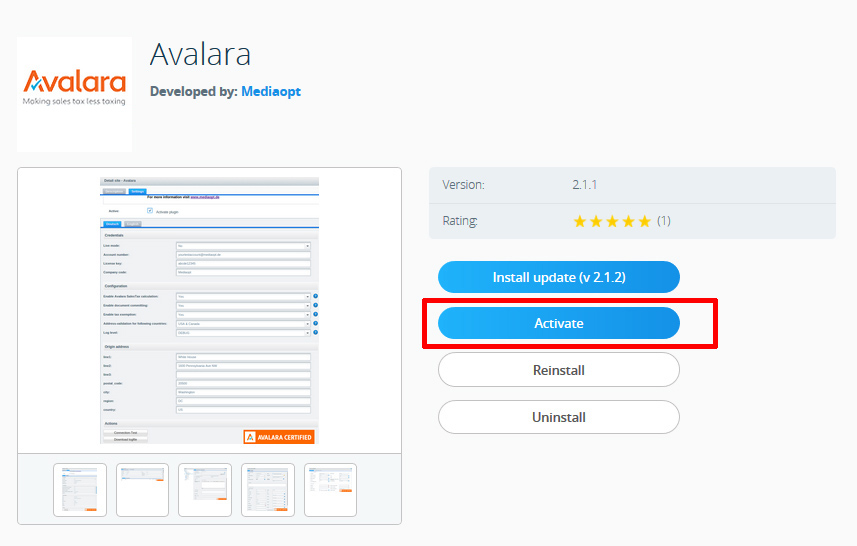
- Locate the Plugin in Uninstalled section and click on edit button.
- In the plugin details popup click on Install button and then on Activate button
FTP Plugin Upload
- Build a connection to your webserver, i.e. via FTP.
- Extract the zip-archive to your shop directory engine/Shopware/Plugins/Local.
- Check that the directory engine/Shopware/Plugins/Local/Backend/MoptAvalara exists
Plugin Activation
Activate the Plugin in Configuration > Plugin Manager > Installed by clicking the Activate/Reinstall plugin button.
Fill in your credentials, edit your configuration, enter your (subshop-specific) origin address and save the Plugin settings.
Credentials:
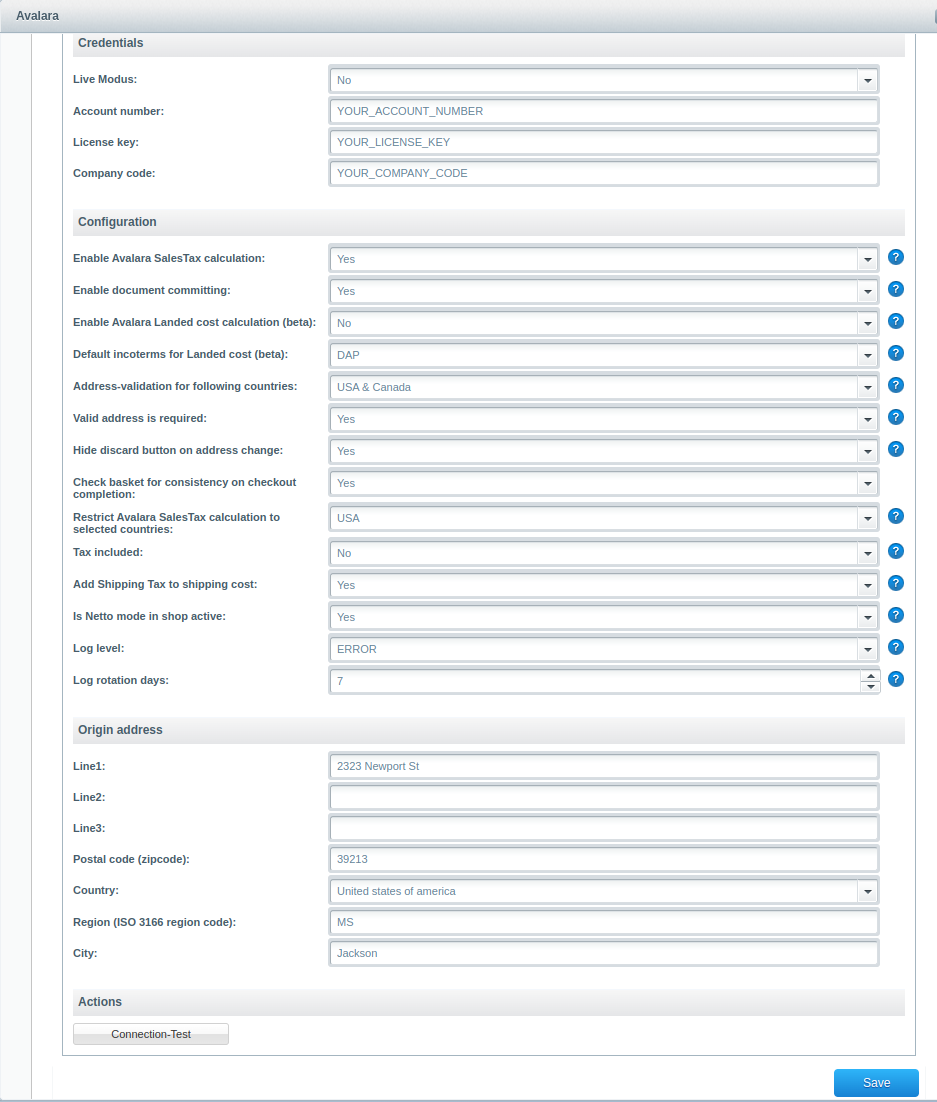
- Live mode: Choose between working in live or test operation.
- Account number: Fill in an account name for your Avalara account.
- License key: Fill in a passwort for your Avalara account.
- Compancy code: Fill in a company code you used in the Avalara admin console.
Configuration:
- Enable Avalara SalesTax calculation: Choose "Yes", if you want to use the Avalara SalesTax Calculation.
- Enable document committing: Disable document committing will result that all calls will be done with DocType=SalesOrder and suppress any non-getTax calls(i.e.canceltax,postTax).
- Enable Avalara Landed cost calculation (beta): Choose "Yes", if you want to use the Avalara Landed cost calculation.
- Default Incoterm for landed cost: currently the plugin supports only DDP (DAP is coming soon).
- Address-validation for following countries: Choose the delivery countries, which should be covered by the Avalara address validation.
- Valid address is required: Choose "Yes, if you want to validate your customers' addresses.
- Hide discard button on address change: Choose "Yes", if you want to enforce your customer to correct his/her address if it is evaluated incorrect by Avalara.
- Check basket for consistency on checkout completion: Basket validation is optional (starting with pluginversion 2.2.2).
- Restrict Avalara SalesTax calculation to selected countries: Choose the country you want to restrict your Avalara Tax calculation to.
- Tax included: Choose "Yes" if you want to have tax included, e.g. in case of gross prices, and choose "No" in case of net prices.
- Add Shipping Tax to shipping cost: Choose "Yes" if you want to calculate shipping tax on top of the shipping price, i.e. net tax calculation for shipping.
- Is Netto mode in shop active: Choose "Yes" if you want to have net tax calculation for your articles and the corresponding setting is activated in the shop.
- Log level: Choose the loglevel of Avalara, which will be logged.
- Log rotation days: Choose how long to keep logs on a server.
Origin address:
Fill in your business address data of your concern.
Actions:
-
Connection test button. Please, enter and save your credential information for the main shop first, then you can test the connection to the Avalara service by clicking on the button.
You may override a credential information for each subshop - they will be used in frontend, but the Connection test will only use credentials of the main shop.
Logfile
The log file will be created on a first logged event depending on a chosen log level:
- For the log level Error only errors will be logged.
- For the log level Info each Avalara call will be reported to the logfile.
- For the log level Debug some additional debug information will alse be reported to the file.
You can checkout and download the log file in Configuration > Logfile > System log. Choose "mopt_avalara-YYYY-MM-DD.log" in the File dropdown select.
Plugin Configuration
Net prices configuration
To activate net tax calculation in your shop, you have to deactivate gross prices in your shop basic settings - Basic settings -> Customer groups -> Customer group for your US/Canada shop -> gross price displayed in frontend not checked.
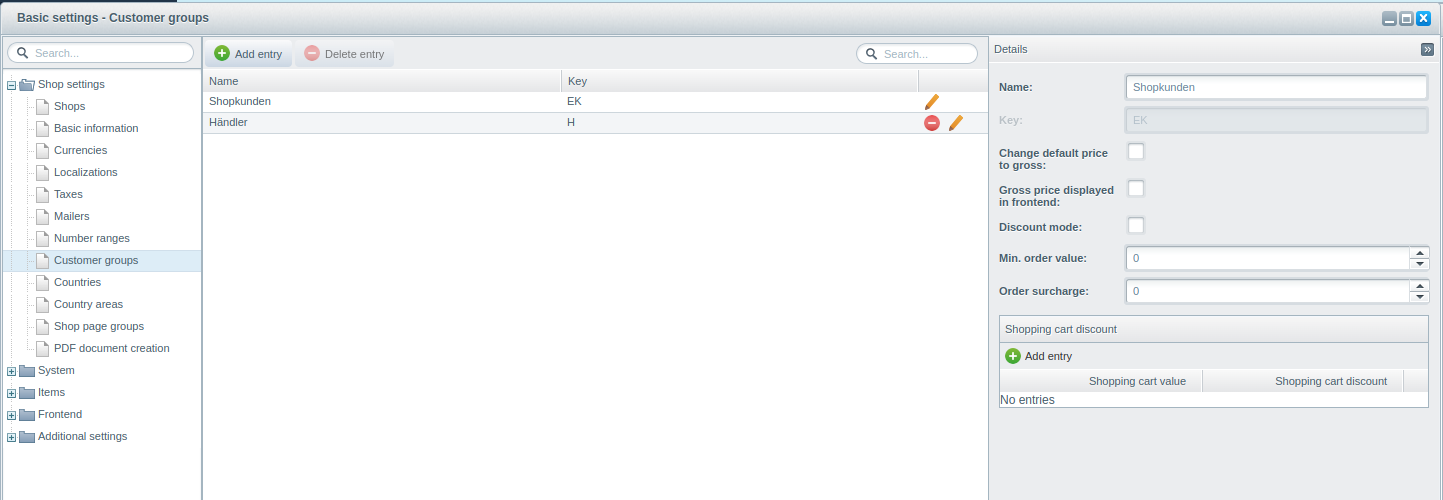
After this you can set the plugin configuration "Is netto mode active" to "yes", as described in the plugin configuration.
Avalara Taxcodes
Avalara has to identify the tax rates for a specific product with Avalara Taxcode which precisely identify the correct tax for a class of products.
To find the correct Taxcode, use Avalara taxcode finder: http://taxcode.avatax.avalara.com/.
Notice: There is a default taxcode, if the sold product is not linked to a taxcode
LandedCost
Avalara provides a service for a Landed cost calculation. You have to assign an hsCode to an article or to a category to have a landed cost calculation for an order.
Article Taxcode
You can link a taxcode direct to your article, if you enter the data in Items > Overview > Edit > Avalara Taxcode.
A Taxcode assigned to a specific article is always dominant over a category Taxcode.
Article hsCode
You can link an hsCode direct to your article, if you enter the data in Items > Overview > Edit > Avalara Harmonized Classification Code (hsCode).
An hsCode assigned to a specific article is always dominant over a category hsCode.

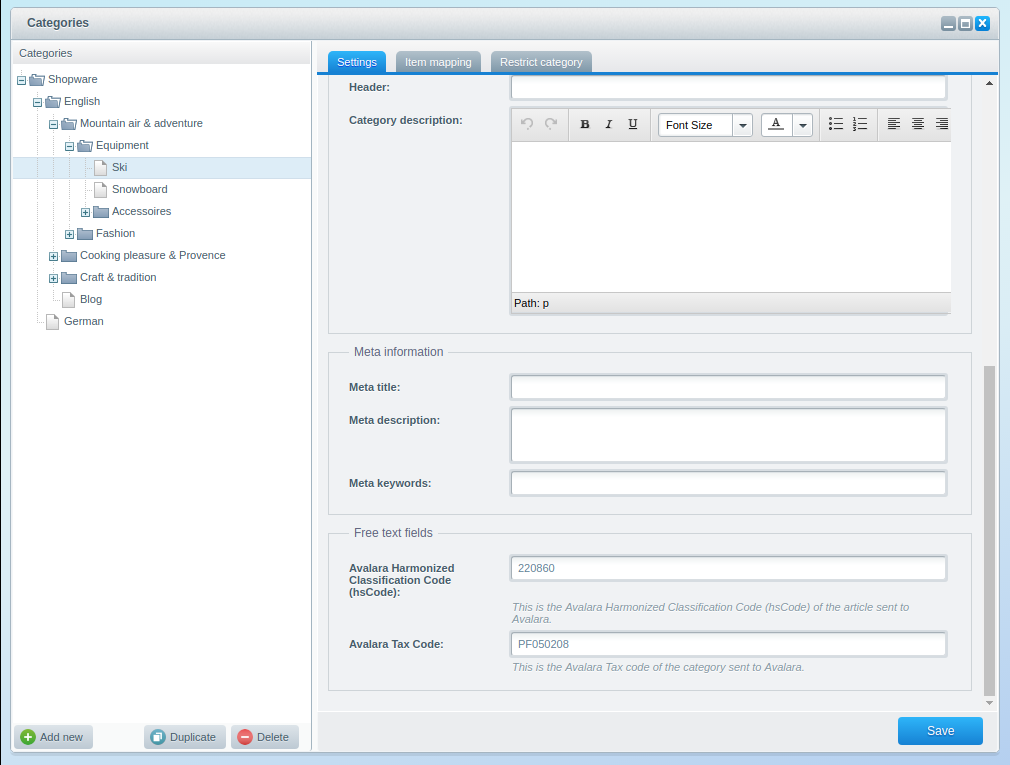
Category Taxcode
You can link all items in a category to a Taxcode, if you enter the data in Items > Categories > Choose a Category > Avalara Taxcode.
Remember: a Taxcode assigned to a specific article is always dominant over a category Taxcode.
Category hsCode
You can link all items in a category to a hsCode, if you enter the data in Items > Categories > Choose a Category > Avalara Harmonized Classification Code (hsCode).
Remember: a hsCode assigned to a specific article is always dominant over a category hsCode.
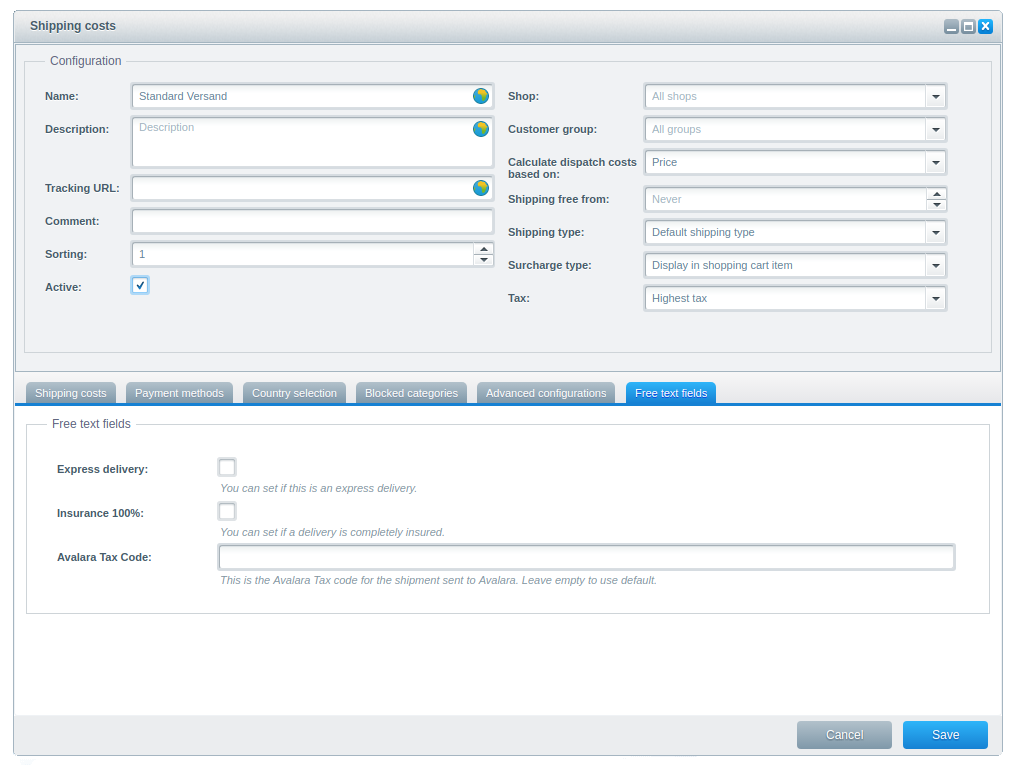
Shipping Taxcode and other options
Dispatching goods in several ways can also change the taxe rates. So you can insert a Taxcode for shipping: Configuration > Shipping costs > Edit > Avalara Taxcode.
A default value is "FR010000".
You can also set the flag "Express delivery" and "insurance 100%" for a shipping method. Both options will affect on a tax and landed cost calculation.
Vouchers and Voucher Taxcode
Voucher or discounts which are valid for all articles do not need a taxcode. In the case of a manufacturer's coupon or article-based coupon, you have to specify a taxcode to the voucher. Restrict the voucher to an item or supplier with activation of the restrict discount button and enter the taxcode. You will find the settings of a voucher in Marketing > Vouchers > Edit.
Note that to smoothly use the article-based coupon with our plugin you have to choose the corresponding articles, but uncheck "Restrict discount" option.
In case of manufacturers you have to check that option.
The tax on the voucher will be shown as 0% in the customer checkout page. Since the plugin receives the tax amount from Avalara API, Shopware will recalculate the tax rate according to the discounted price, so the tax rate in the shop will differ from that of Avalara, but the tax amount will be the same, which id the desired behaviour. 
Customer Exemption Code
There are associations as customers, who can purchase without paying taxes. For that case you can enter an exemption code on customer-level. If the exemption code has an entry Avalara handle the orders of that customer as tax-free. You can enter the exemption code in Customers > Customers > Edit > Avalara Exemption Code.
After Sale Features
To handle committing, cancelation or changing an order, the Avalara Plugin offers features:
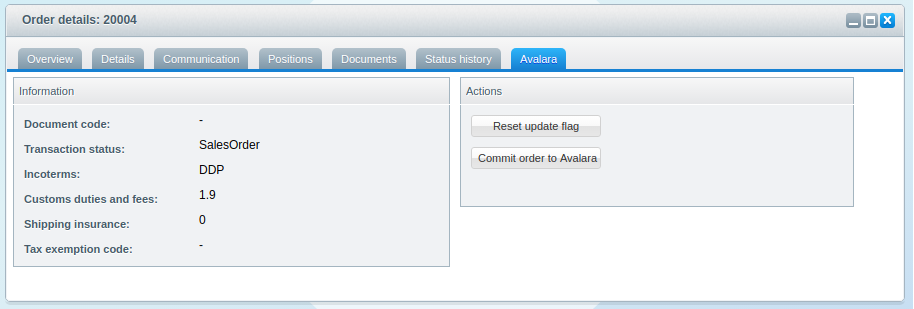
Order commiting
Once you have checked an order and ready to commit it to Avalara, go to Customers > Orders > Edit > Avalara tab and click the "Commit order to Avalara" button.
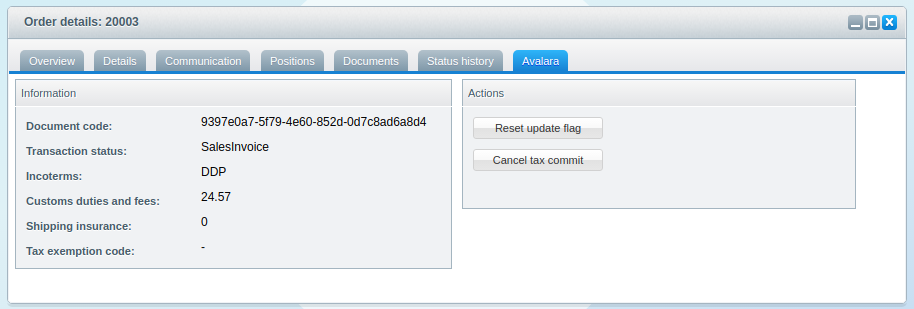
Order cancelation
If for some reasons an order using the Avalara tax system has been canceled and you want that information to be transmitted to Avalara, go to Customers > Orders > Edit > Avalara tab and click the "Cancel tax commit" button.
The order only will be voided in the Avalara tax system and will not influence the order in your shop. The cancelation of an order is irrevocable.
Changing an order
If you change an Avalara order in your shop backend, the Avalara Plugin observe the changing and will switch the Avalara Icon to signal that the current order has been changed.
![]()
New order (committed)
New order (not committed)
Merchant has void the order (transaction canceled, not committed)
Merchant has changed order details
The old Avalara-Plugin was used. Open the order details to automatically update Avalara data.
Note: Please do not change an order after the order was committed to Avalara. It is not possible to recalculate.
If you have changed an order, the Avalara icon will be changed to "Merchant has changed order details" state.
If you did not change a tax relevant data and just want to adjust the Avalara Icon to looking good, you have to go to Customers > Orders > Edit > Avalara tab and click the "Reset update flag" button.
Committing with cronjob
Our plugin has an Avalara committing cronjob:
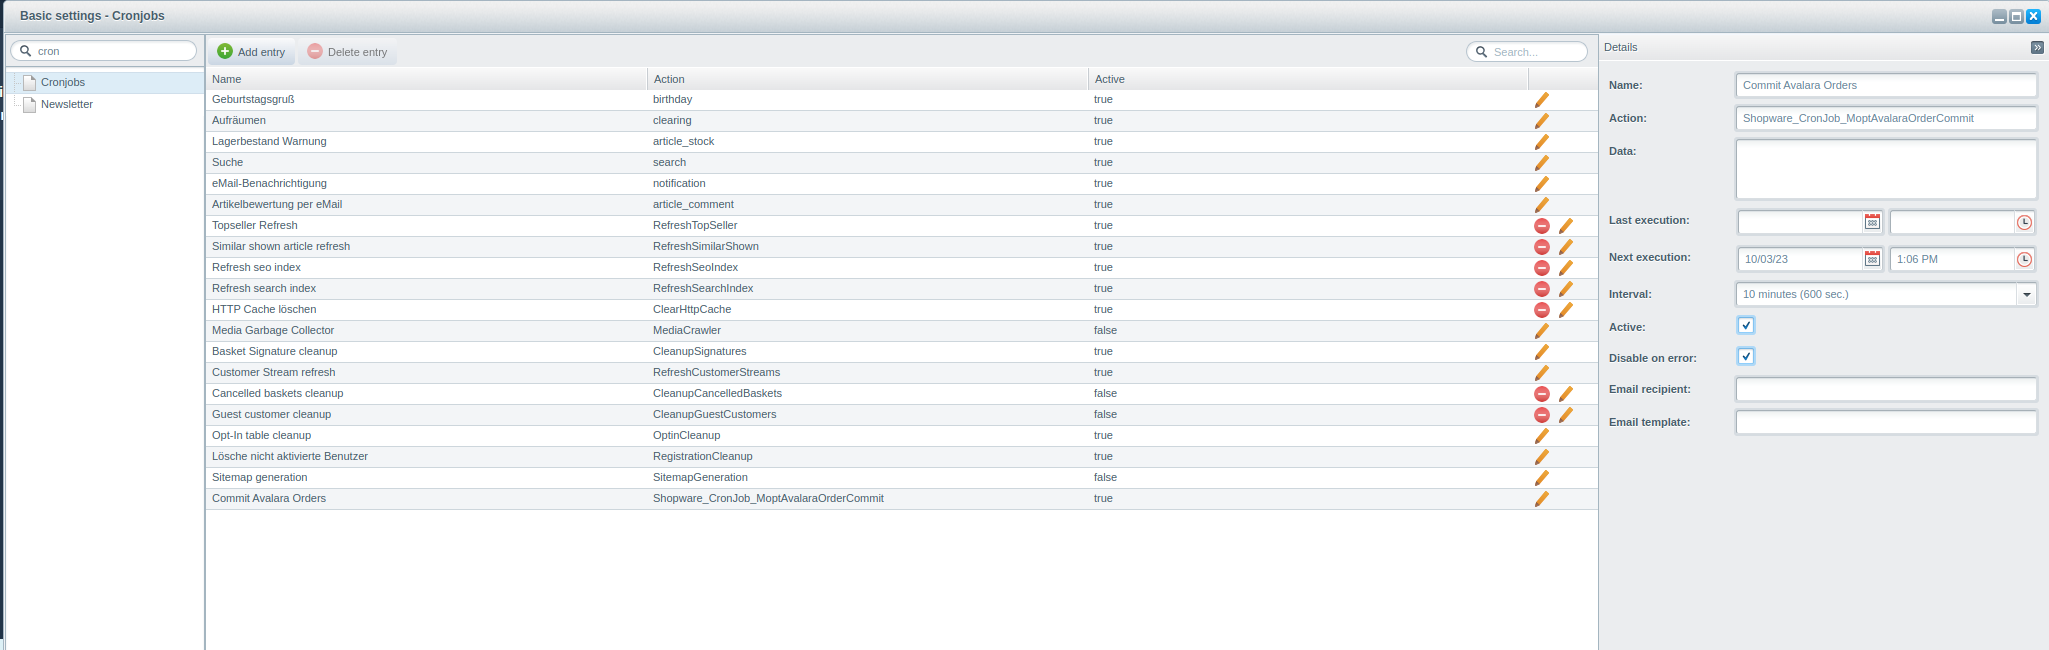
After interval configuration and cronjob activation, it will be triggered for the orders with the order status "completely delivered".
To run your cronjobs, execute "php bin/console sw:cron:run" in your shop folder. For more information refer to: https://docs.shopware.com/en/shopware-5-en/settings/system-cronjobs