User Manual

Shopware versions: From 4.1.x – 5.x.x CE
Module Language : english
PHP version : 5.4 or higher
More information for Avalara: http://www.avalara.com/
This manual shows you step by step how to install the plugin to your online shop. Please test the installation and the configuration of the plugin on a test system before installing it on your live shop.
- Inhaltsverzeichnis
- The Plugin
- Plugin installation
- Plugin Configuration
- After Sale Features
The Plugin
The Avalara Shopware Plugin enables an easy handling of exporting products to countries like Canada and the USA. The USA is known for an unclear tax system.So Avalara is taking over the accounting of taxes. The Plugin connects your Shopware Shop with Avalara. For each transaction to selected countries, the customers of your shop will get a runtime tax-result for their current order. After an Ordering the data and the tax-result will be transmitted to Avalara and Avalara will report the taxes to the corresponding government.
The module offers a multitude of settings to adapt your products to each tax-system.
Plugin installation
Before you begin with the installation process, backup your database and your online shop. If you have concerns about installing the Plugin, let this job be done by a professional, or feel free to contact us for help. Please, follow this instruction carefully for an undisturbed use.
Shopware Plugin Manager
- Log in to your shop backend.
- Go to: Configuration > Plugin Manager > My Extensions > Community Extensions.
- Click the button add Plugin manually.
- Choose your directory, which has the Plugin and upload it.
FTP Plugin Upload
- Build a connection to your webserver, i.e. via FTP.
- Copy the content of the directory MoptAvalara to your shop directory engine/Shopware/Plugins/Community/Backend.
Plugin Activation
Activate the Plugin in Configuration > Plugin Manager > My Extensions > Community Extensions. by clicking the Activate plugin button. Fill in your credentials, choose your configuration, enter your (subshop-specific) origin address and save the Plugin settings.
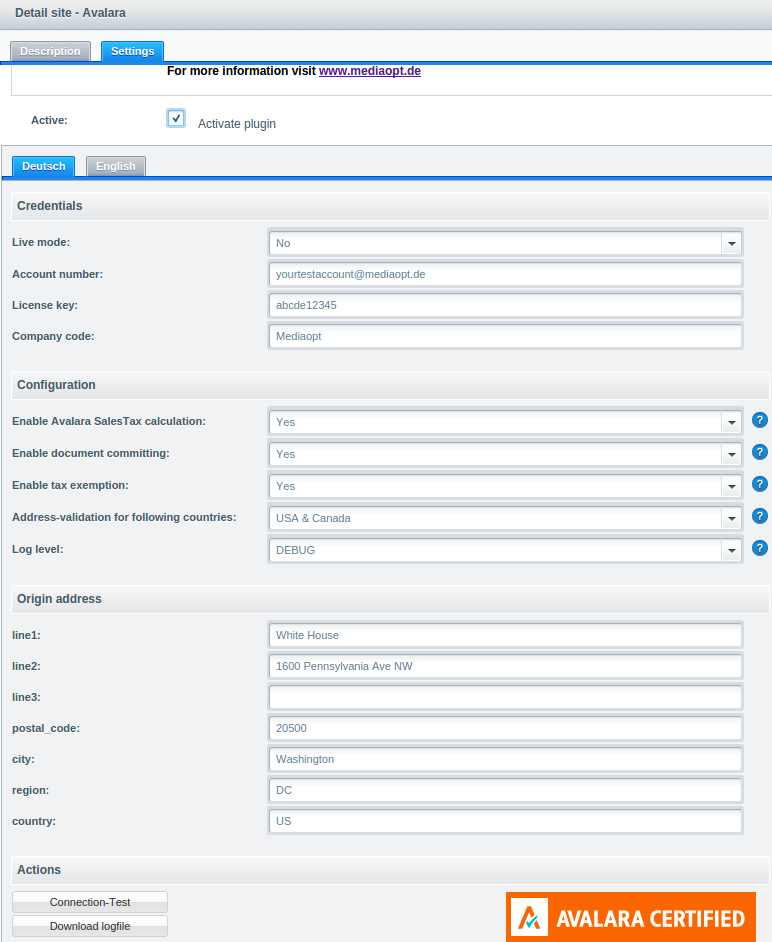
Credentials:
- Live mode: Choose between working in live or test operation.
- Account number: Fill in your account name for your Avalara account.
- License key: Fill in your passwort for your Avalara account.
- Compancy code: Fill in your company code you used in the Avalara admin console.
Configuration:
- Enable Avalara SalesTax calculation: Choose "Yes", if you want to use the Avalara SalesTax Calculation.
- Enable document committing: Disable document committing will result that all calls will be done with DocType=SalesOrder and suppress any non-getTax calls(i.e.canceltax,postTax).
- Enable tax exemption: Activate, if you have associations as customers, who can purchase without paying taxes (exemption certificates).
- Adress-validation for following countries: Choose the delivery countries, which should be covered by the Avalara Tax Calculation.
- Log level: Choose the loglevel of Avalara, which will be logged.
Origin address:
Fill in your business address data of your concern.
Actions:
- Test-Connection-Button: You have to enter and save your credential information once, then you can test the connection to the Avalara service by clicking the button.
- Download logfile: Clicking this button will start the download of the current logfile to your desktop PC.
Logfile
The logfile will be created automatically after the Plugin is activated. Each Avalara call will be reported to the logfile and for each month a new logfile will be created (filename: mo_avalara_yearMonth.log).
Plugin Configuration
Avalara has to identify the tax rates for specific products. So there exists Avalara Taxcodes which precisely identify the correct tax for a class of products. To find the correct Taxcode, Avalara provide a taxcode finder: http://taxcode.avatax.avalara.com/.
Notice: There is a default taxcode, if the sold product is not linked to a taxcode
Article Taxcode
You can link your article direct to a taxcode, if you enter the data in Items > Overview > Edit > Avalara Taxcode. A Taxcode on a specific article is always dominant to a Taxcode on category level.

Category Taxcode
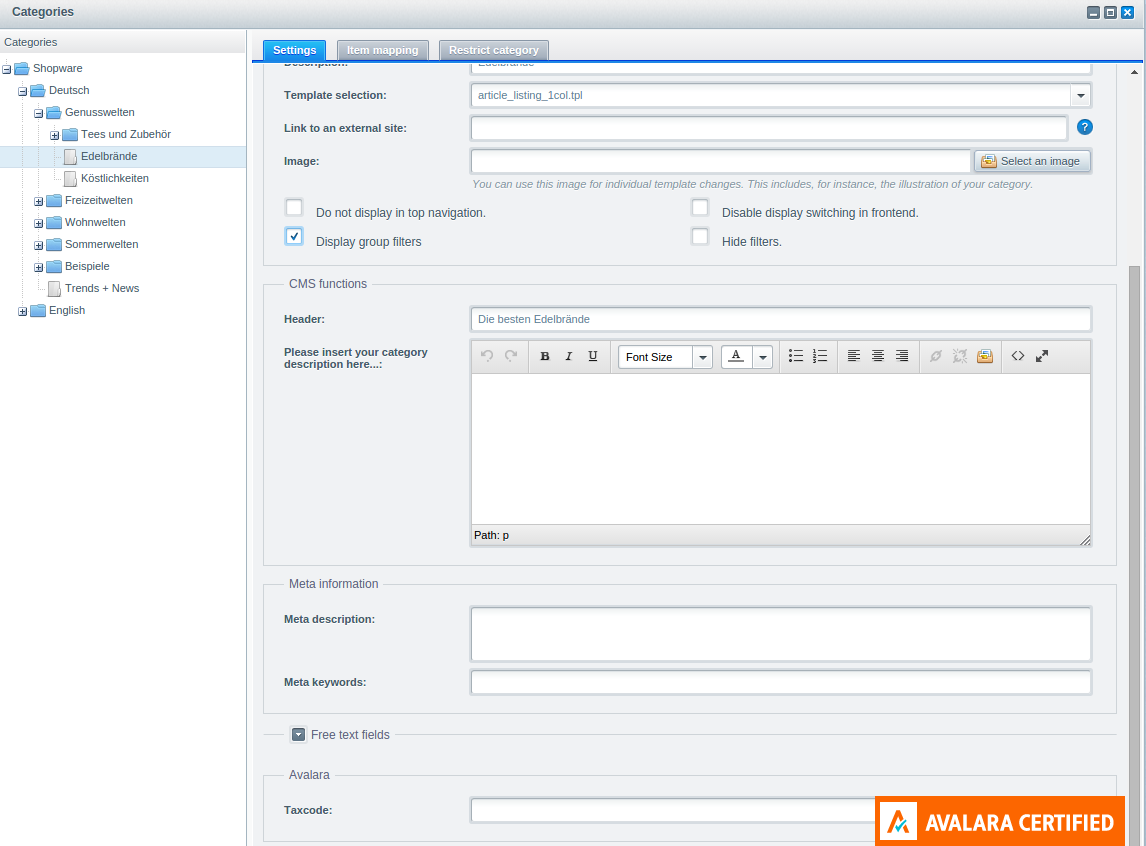
You can link all items in a category to a Taxcode, if you enter the data in Items > Categories > Choose Category > Avalara Taxcode.
Shipping Taxcode
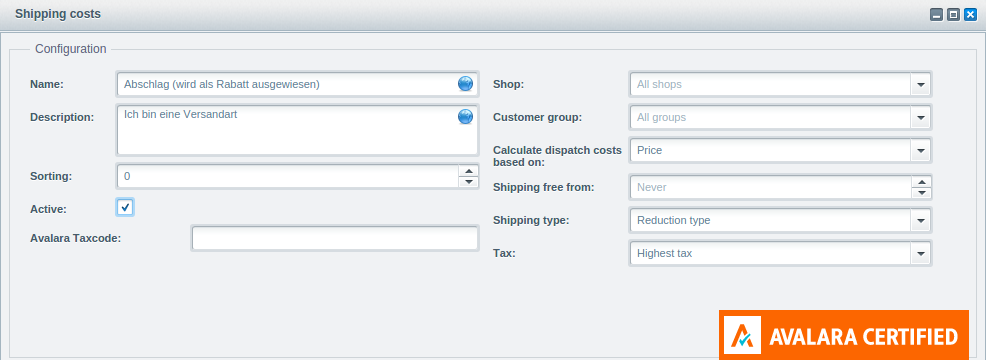
Dispatching goods in several ways can also change the taxe rates. So you can insert a Taxcode for shipping. Configuration > Shipping costs > Edit > Avalara Taxcode.
Voucher Taxcode
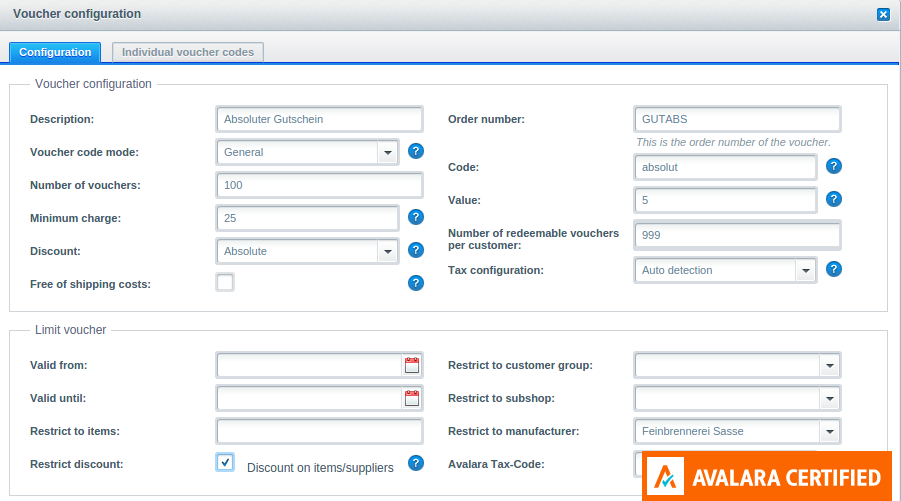
Voucher or discounts which are valid for all articles do not need a taxcode. In the case of a manufacturer's coupon or article-based coupon, you have to specify a taxcode to the voucher. Restrict the voucher to an item or supplier with activation of the restrict discount button and enter the taxcode. You will find the settings of a voucher in Marketing > Vouchers > Edit.
Customer Exemptioncode
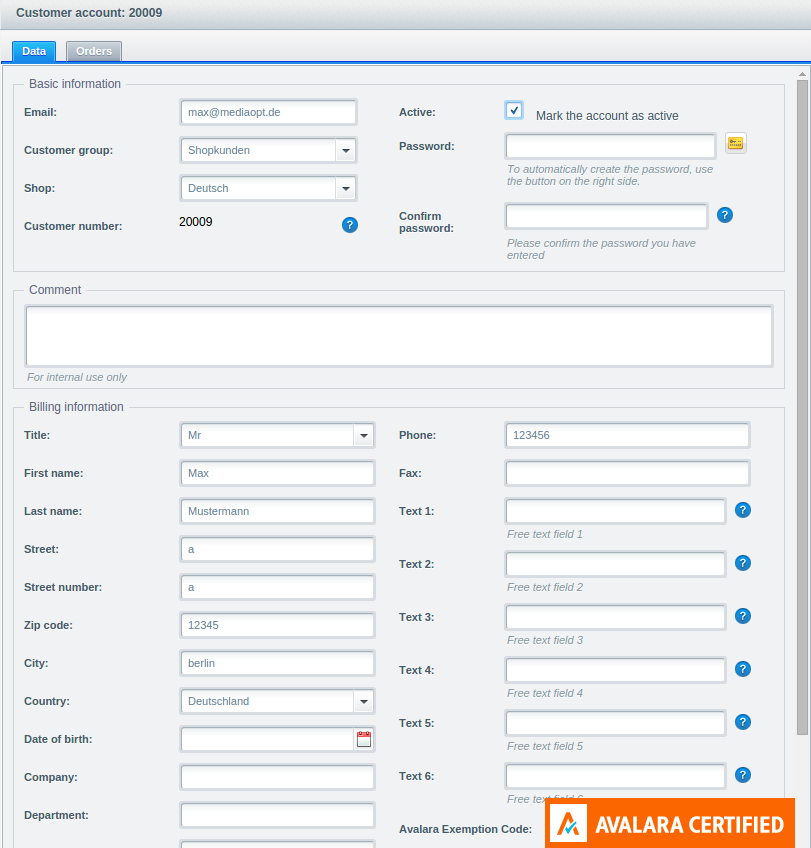
There are associations as customers, who can purchase without paying taxes. For that case you can enter an exemption code on customer-level. If the exemption code has an entry Avalara handle the orders of that customer as tax-free. You can enter the exemption code in Customers > Customers > Edit > Avalara Exemption Code.
After Sale Features
To handle cancelation or changing an order, the Avalara Plugin offers features to change transmitted orders.
Order cancelation
For some reasons an order using the Avalara tax system is canceled and you want that information transmitted to Avalara. Go to Customers > Orders > Edit > Avalara and click the cancel tax button. The order only will be voided in the Avalara tax system and will not influence the order in your shop. The cancelation of an order is irrevocable.

Changing an order
If you change an Avalara order in your shop backend, the Avalara Plugin observe the changing and will switch the Avalara Icon to signal that the current order is not transmitted to Avalara.
![]()
If the change influences tax relevant data, you have to go to Customers > Orders > Edit > Avalara and click the update order button. Accordingly the changed order is transmitted to Avalara. If you do not change tax relevant data and just want to adjust the Avalara Icon to looking good, click the reset update flag button.