User Manual for the Concardis Shopware Plugin

Shopware versions: from 5.0.x – 5.2.12
Plugin version: 1.0.3
Plugin language : german, english
- * The plugin Concardis and Ingenico are identical. Accordingly, the manual also applies to all plugins. Please note the naming conventions (ogone, payengine).*
This manual shows you step by step how to install the plugin to your online shop. Please test the installation and the configuration of the plugin on a test system before installing it on your live shop.
- Inhaltsverzeichnis
- User Manual for the Concardis Shopware Plugin
- The Plugin
- StatusCodeMapping
- AfterSale
- Adding an own payment method
- Credit Cards
- Scoring and PayID in Orderlist
- Configuration in Concardis backend
The Plugin
The Concardis plugin for Shopware provides the opportunity to handle with all payment methods, which are offered by Concardis.
Choose your favoured payment methods and add them easily to your shopware shop.
Following default payment methods will supported by our plugin:
- Credit cards
- PostFinance Card
- giropay
- Sofortüberweisung.de
- iDEAL
- PostFinance E-Finance
- eps Österreich
- Debit DE
- Debit NL
- PayPal
- mPass
- BillPay
- Mister Cash
In addition, the plugin provides the possibility to add further payment methods, which has to be supported by Concardis.
Plugin Installation
Before you start with the installation process, backup your database and your online shop. If you have concerns about installing the plugin, let this job be done by a professional, or feel free to contact us for help. Please, follow this instruction carefully for an undisturbed use.
Shopware Plugin Manager
- Log in to your shop backend.
- Go to: Configuration > Plugin Manager > My Extensions > Community Extensions.
- Click the button add Plugin manually.
- Choose your directory, which has the plugin and upload it.
FTP Plugin Upload
- Build a connection to your webserver, i.e. via FTP.
- Copy the content of the directory Moptpayengine to your shop directory engine/Shopware/Plugins/Community/Core.
Plugin Activation
Activate the plugin in Configuration > Plugin Manager > My Extensions > Community Extensions. by clicking the Activate plugin button. Fill in your credentials and security data, choose your configuration and save the plugin settings.
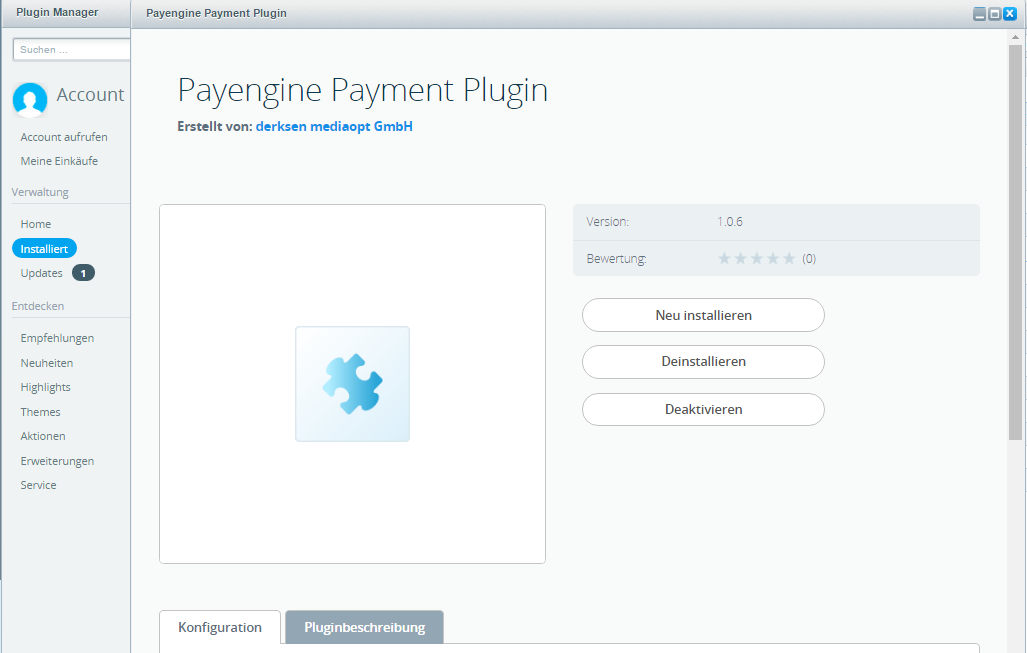
Plugin Configuration
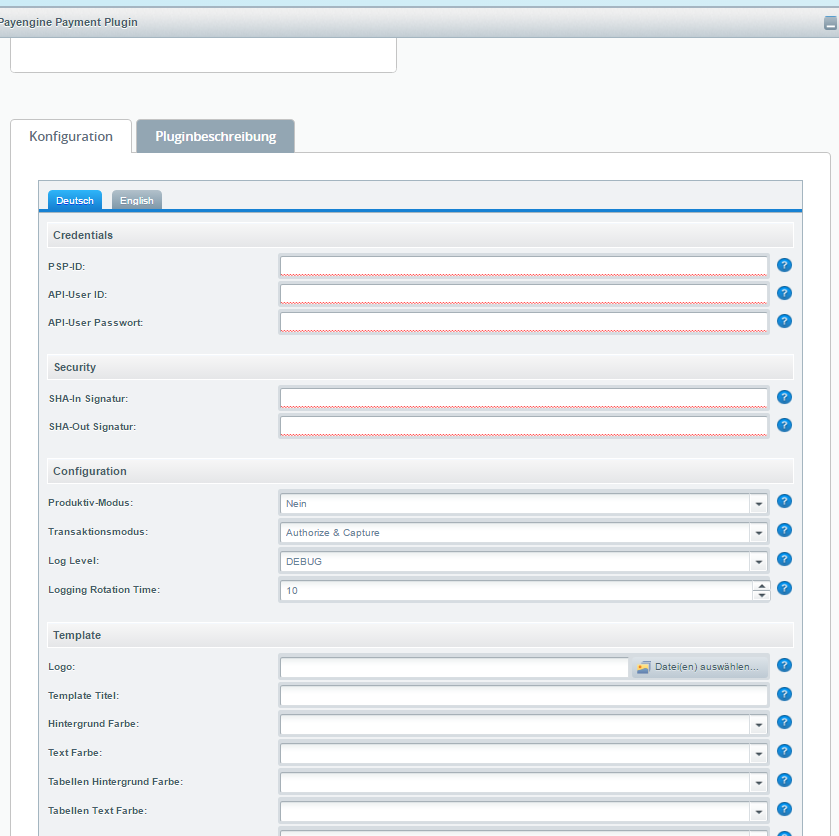
Credentials:
- PSP-ID: The payment service provider id is the given user name of your company for your Concardis account.
- API-User ID: Name of your API-User, check up your existing API-users in Configuration/Users in your Concardis account.
- API-User Password: Password of your API-User.
Security:
- SHA-IN: Registered security key(SHA-IN), check up your key in Configuration/Technical information/Data and origin verification..
- SHA-OUT: Registered security key(SHA-OUT), check up your key in Configuration/Technical information/Transaction feedback..
Configuration:
- Live-Modus: Choose between test and live mode.
- Transaktionsmodus: Choose your transaction mode. Set your specified settings under Configuration/Technical information/Global security parameter. Not every payment method supports Sale.
- Log Level: Choose your log level. For productive mode we suggest `error` as log level.
- Logging Rotation Time: Choose the number of days, which log files should be saved.
Payment Template:
- Logo: The choosen logo will be displayed on the payment page.(Only https)
- Template Title: Title on the payment page.
- Background Color: Table background colour on the payment page.
- Text Color: Table text colour on the payment page.
- Table Background Color: Table background colour on the payment page.
- Table Text Color: Table text colour on the payment page.
- Button Background Color: Button background colour on the payment page.
- Button Text Color: Button text colour on the payment page.
- Button Font Type: Font type/family used on the payment page.(Arial)
Hint: All hexcodes will be supported (e.g. #0088FF sky-blue)
Expert Options:
- Show Expert Fraud Detection Show Scoring value of the customer in the order list*
Actions:
- Download Logfile: Download the Concardis logfile of the current day.
StatusCodeMapping
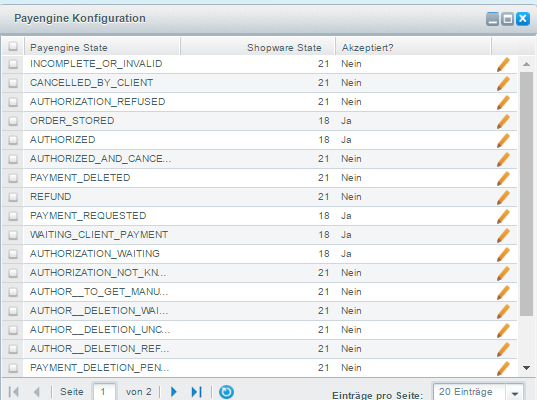
- Before using the Concardis plugin, you have to configure the Concardis status mapping.
- Open Configuration > Concardis > Concardis Config. A list will show you the current configuration of the states
- You have to decide, which response of Concardis will be allowed to create an order. After a payment the customer will be either redirected to your finish site or back to the checkout overview depending on the acception of the state.
- Additionally you can map each Concardis state to one of your shopware states, which will change the payment state to the last response of Concardis.
AfterSale
- For capture and refund actions, open Customers > Orders.
- Choose your order, which you want to edit and then click on the position tab and mark all positions, which should be influenced by this action.

- Now use the capture or refund position action.
- A window will open with an information of the amount of your marked positions.
- You can manually change the amount and add shipping costs additional to the amount of your action.
- Choose between an action, which can be repeated several times or end the possibility to repeat this action again.
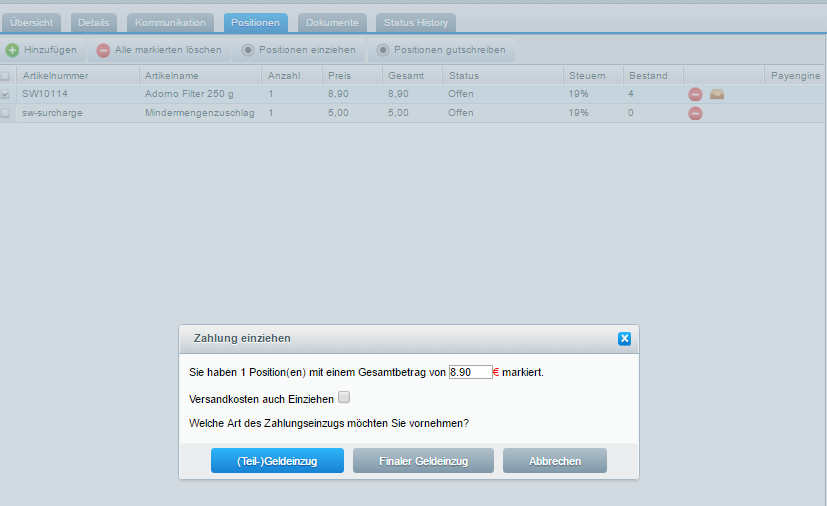
Hint: If you change the amount of the action, taxes will not be included
Adding an own payment method
- Open in your shop backend Configuration > Payment methods.
- Choose an Concardis payment method and duplicate that payment method.
- Now there exists a copy of a payment method with the same attributes as the chosen method except an additional number on the name attribute. The payment method will only be working, if the action attribute is copied (Moptpayengine/index).
- Change the name of the copy (name with number) to the desired payment method, using our name convention (mopt_payengine_type_brand).
- Now adapt the description and other important attributes and test the payment method.
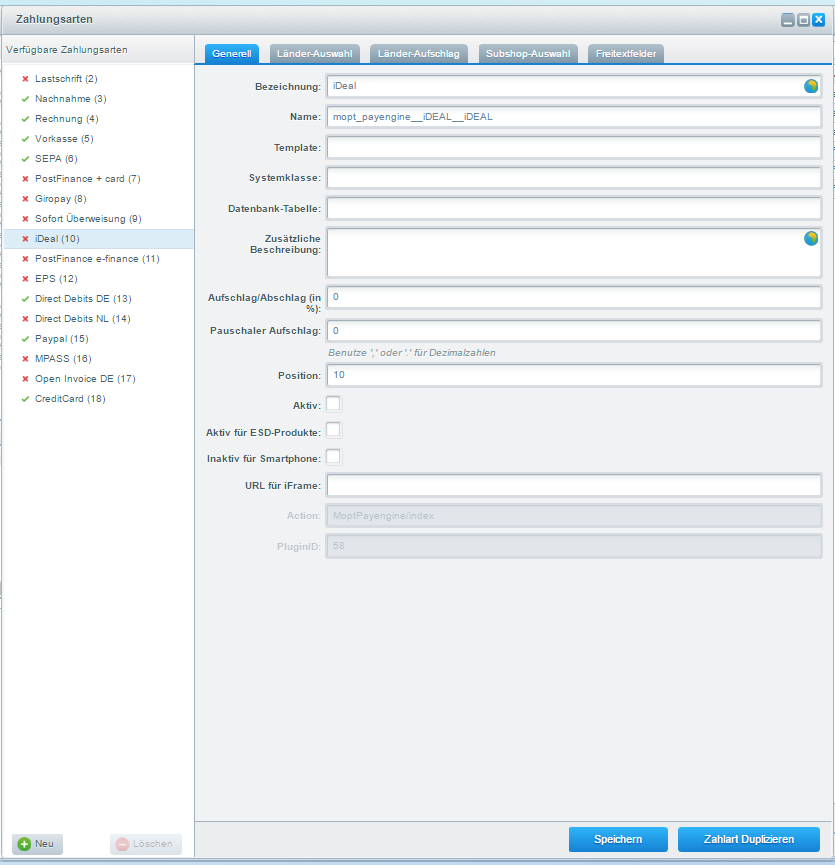
- Example: If you want to add the payment method JCB, which has the type CreditCard, edit the name to mopt_payengin_CreditCard_JBC
Hint: You can only add a payment method which is supported by Concardis.
Credit Cards
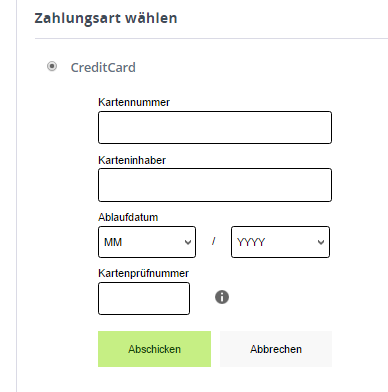
Our Plugin provides the Concardis Hosted Tokenization Page for all common credit cards.
On the shipping-payment page the customer will always have to introduce his card details onto the Hosted Tokenization page. In this way, the card details never pass through your own web server. Its advantage is that the customer will stay on your page and build a complete One Page Check-out experience.
All major credit card brands (VISA, MasterCard, American Express, Diners) are supported.
Activate the payment method credit card in your backend and change the labeling to your preferred description.
Scoring and PayID in Orderlist
Our plugin supports the Expert Fraud Detection by Concardis.
You have to configure the fraud detection on the Concardis backend.
If you enable "Show Expert Fraud Detection" in our plugin, you will see for each successful order a color code for each customer in the order list to check their credit rating.
The Concardisreference id will be displayed always in the order list.

Configuration in Concardis backend
Global transaction parameters
Settings for a sandbox account of Concardis will be done on https://secure.ogone.com/Ncol/Test/BackOffice/login/. For the production Concardis account use https://secure.ogone.com/Ncol/Test/BackOffice/login/.
The settings will be done on Configuration > Technical Information. Perform the settings on the basis of the illustrations.

Global security parameters
We only support SHA-512 hashing and the default character encoding nowadays is UTF-8. If you notice an issue on displaying special character, change the character encoding to solve that problem.

Data and origin verification
Choose your SHA-IN pass phrase and use the same SHA-IN in the Concardis plugin on the shopware backend.

Transaction feedback
Enter your shop url + /Moptpyengine/deferredFeedback into the "Direct HTTP server-to-server request" and "the HTTP request for status changes" form.
Choose your SHA-OUT pass phrase and use the same value for the Concardis plugin on the shopware backend.
We suggest to select all dynamic parameters for a flawless launch

